Difference between revisions of "INDU-RS"
(→Steps:) |
(→Setting up the system) |
||
| Line 56: | Line 56: | ||
# Ensure all the jumpers are in place according to your application use. | # Ensure all the jumpers are in place according to your application use. | ||
# Now power up the full setup | # Now power up the full setup | ||
| + | ::''Note: Before powering up ensure correct software image is loaded in Beaglebone black or VIBE/VIBE2'' | ||
::; For INDU-RS3HD | ::; For INDU-RS3HD | ||
:: You have to supply 5V DC power supply to Beaglebone Black or VIBE/VIBE2. | :: You have to supply 5V DC power supply to Beaglebone Black or VIBE/VIBE2. | ||
Revision as of 04:21, 14 March 2017
Contents
[hide]Overview
Yantrr INDU-RS series of capes provide the capability of interfacing with sensors and instruments using RS232/422/485. These capes are designed to industrial grade I/O interface standards assuring reliable operation and protection in extreme operating environments. The electronics on the capes has been tested to be in compliance with strict EU standards for radiated and conducted emissions.
Utilizing Modbus protocol, these capes can be used to transform VIBE/VIBE2 IoT platform into powerful SCADA & process control systems. INDU-RS capes are also fully compatible with BeagleBone CPU platform.
Quick Start Guide
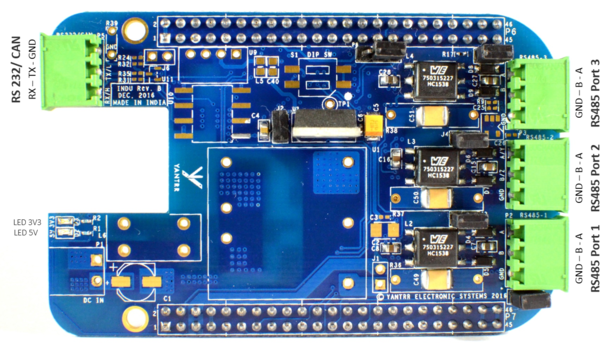
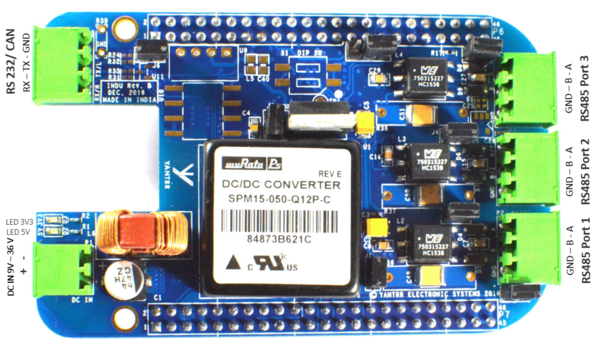
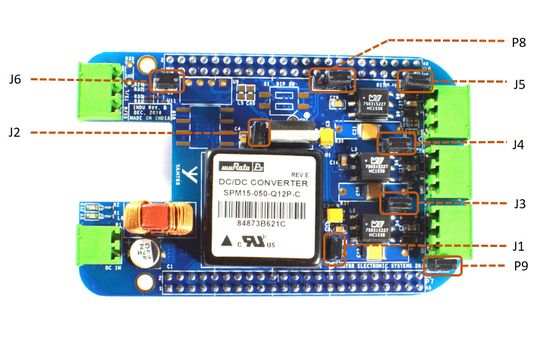
Following sections gives details of board connectors, pin configuration and various jumpers on INDU-RS3HD, INDU-RS3HD-DC15W boards.
Board Connectors Layout
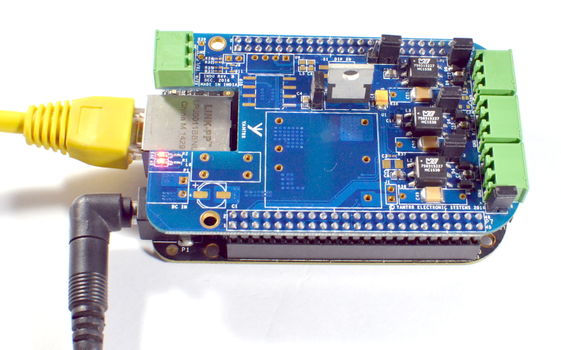
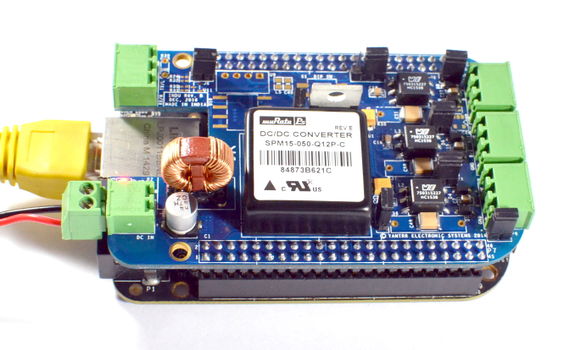
| INDU-RS3HD | INDU-RS3HD-DC15W |
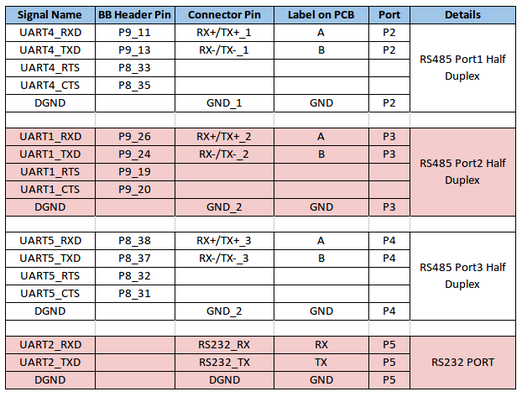
Pin Connections
Note: INDU-RS485 Headers P6 & P7 correspond to Beaglebone Black [BB] Header P8 & P9 respectively.
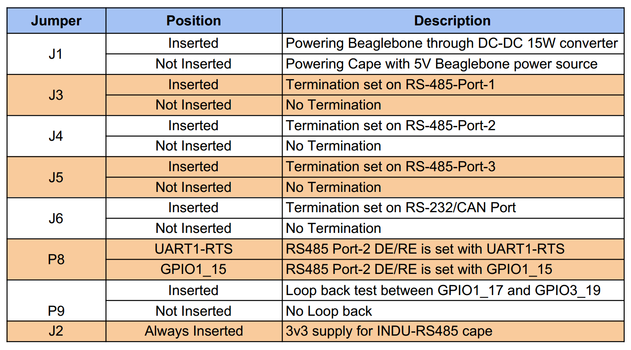
Jumper Details
Getting Started
Setting up the system
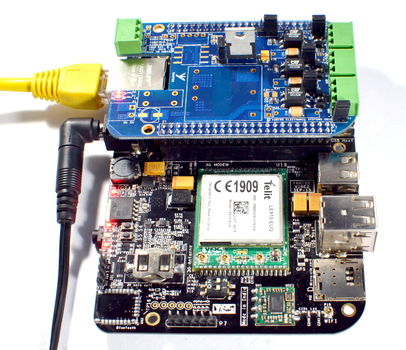
- Mount the INDU-RS cape on Beaglebone Black or Yantrr's VIBE/VIBE2 platform carefully.
- Ensure all the jumpers are in place according to your application use.
- Now power up the full setup
- Note: Before powering up ensure correct software image is loaded in Beaglebone black or VIBE/VIBE2
- For INDU-RS3HD
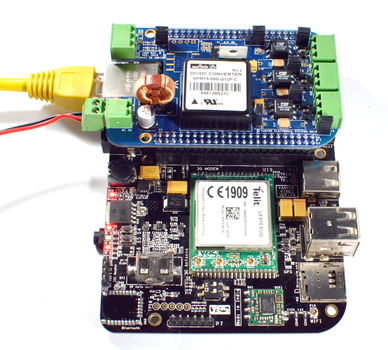
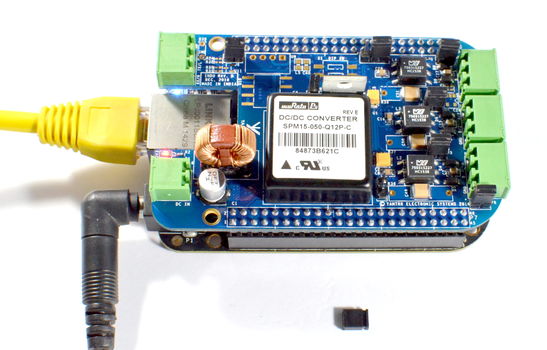
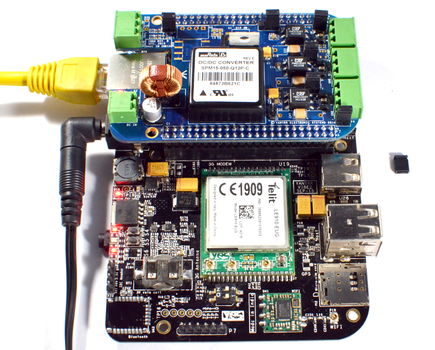
- You have to supply 5V DC power supply to Beaglebone Black or VIBE/VIBE2.
- Note: Before powering up ensure correct software image is loaded in Beaglebone black or VIBE/VIBE2
| Using Beaglebone Black | Using VIBE/VIBE2 |
- For INDU-RS3HD-DC15W
-
- You have two option for supplying power:
- 9V-24V DC power through terminal headers supplied to INDU-RS cape
- You have two option for supplying power:
| Using Beaglebone Black | Using VIBE/VIBE2 |
- 5V DC power through normal adapter supplied to Beaglebone Black or VIBE/VIBE2
Note : For this option, before powering up remove the jumper J1
- 5V DC power through normal adapter supplied to Beaglebone Black or VIBE/VIBE2
| Using Beaglebone Black | Using VIBE/VIBE2 |
Software Setup Guide
- INDU-RS3HD, INDU-RS3HD-DC15W
Software Images
The INDU-RS series capes are tested with latest-release image from beagleboard.org which has inbuilt support for OMAP internal UART (8250 based driver).
Currently INDU-RS485 cape is tested with beaglebone black kernel version 4.4.40-ti-r80.
For Beaglebone Black, we recommend to use latest Debian image from http://beagleboard.org/latest-images/ as it comes with all the necessary support for OMAP internal UART (8250 based driver).
Device Tree Overlays
For particular RS485 port two dtbo files are there
- BB-UART*-00A0.dtbo
- BB-UART*-RTSCTS-00A0.dtbo
Note : * represents the particular port no. of UART used in respective RS485 port. For example, for RS485-Port1 it will be UART4.
The BB-UART*-00A0.dtbo file defines the TX and RX pin configuration of particular UART port. While BB-UART*-RTSCTS-00A0.dtbo file defines the RTS and CTS pin configuration of UART port.
For sending data from any RS485 port, both dtbo files(BB-UART & BB-UART-RTSCTS) of associated UART port should be exported to slots before actual sending of data.
For reading data from any RS485 port, only BB-UART dtbo file is sufficient to get data from associated UART port.
The device tree overlays are compiled as per instructions listed in link https://github.com/RobertCNelson/bb.org-overlays.
Steps:
- Clone the repo
git clone https://github.com/beagleboard/bb.org-overlays
cd ./bb.org-overlays
- Verify the dtc version should be latest one
dtc --version
Version: DTC 1.4.1-gXYZXYZXYZ
- Upgrade the dtc
./dtc-overlay.sh
- Copy Yantrr-RS485 dts files after extracting ytrDTS.tar.gz file in root directory
cp /root/ytrDTS/src/BB-UART* ./src/arm/
- Install *.dtbo
./install.sh
Note: This will copies all the dtbo files after compilation automatically in directory /lib/firmware/
- capemgr: enable/disable capes on kernel cmdline:
Comma delimited list of PART-NUMBER[:REV] of [enabled/disabled] capes
bone_capemgr.enable_partno=
bone_capemgr.disable_partno= - capemgr: enable/disable capes with slots:
root@beaglebone:~# cat /sys/devices/platform/bone_capemgr/slots
 0: PF----  -1
 1: PF----  -1
 2: PF----  -1
 3: PF----  -1
- Add Device :
root@beaglebone:~# sh -c "echo 'BB-UART4' > /sys/devices/platform/bone_capemgr/slots"
root@beaglebone:~# cat /sys/devices/platform/bone_capemgr/slots
 0: PF----  -1
 1: PF----  -1
 2: PF----  -1
 3: PF----  -1
 4: P-O-L-   0 Override Board Name,00A0,Override Manuf,BB-UART4
- Remove Device:
root@beaglebone:~# sh -c "echo '-4' > /sys/devices/platform/bone_capemgr/slots"
root@beaglebone:~# cat /sys/devices/platform/bone_capemgr/slots
 0: PF----  -1
 1: PF----  -1
 2: PF----  -1
 3: PF----  -1
